Quick start guide
Get your first project configured in under 10 minutes.
What you'll have at the end
By the end of this guide, you'll have created an AI use case, attached a compliance framework to it, reviewed the generated controls and uploaded your first piece of evidence. That's enough to see your compliance percentage on the dashboard.
- Create an AI use case
- Attach a compliance framework (EU AI Act, ISO 42001, etc.)
- Browse the controls that get generated
- Upload evidence to the evidence hub
- See progress reflected on the dashboard
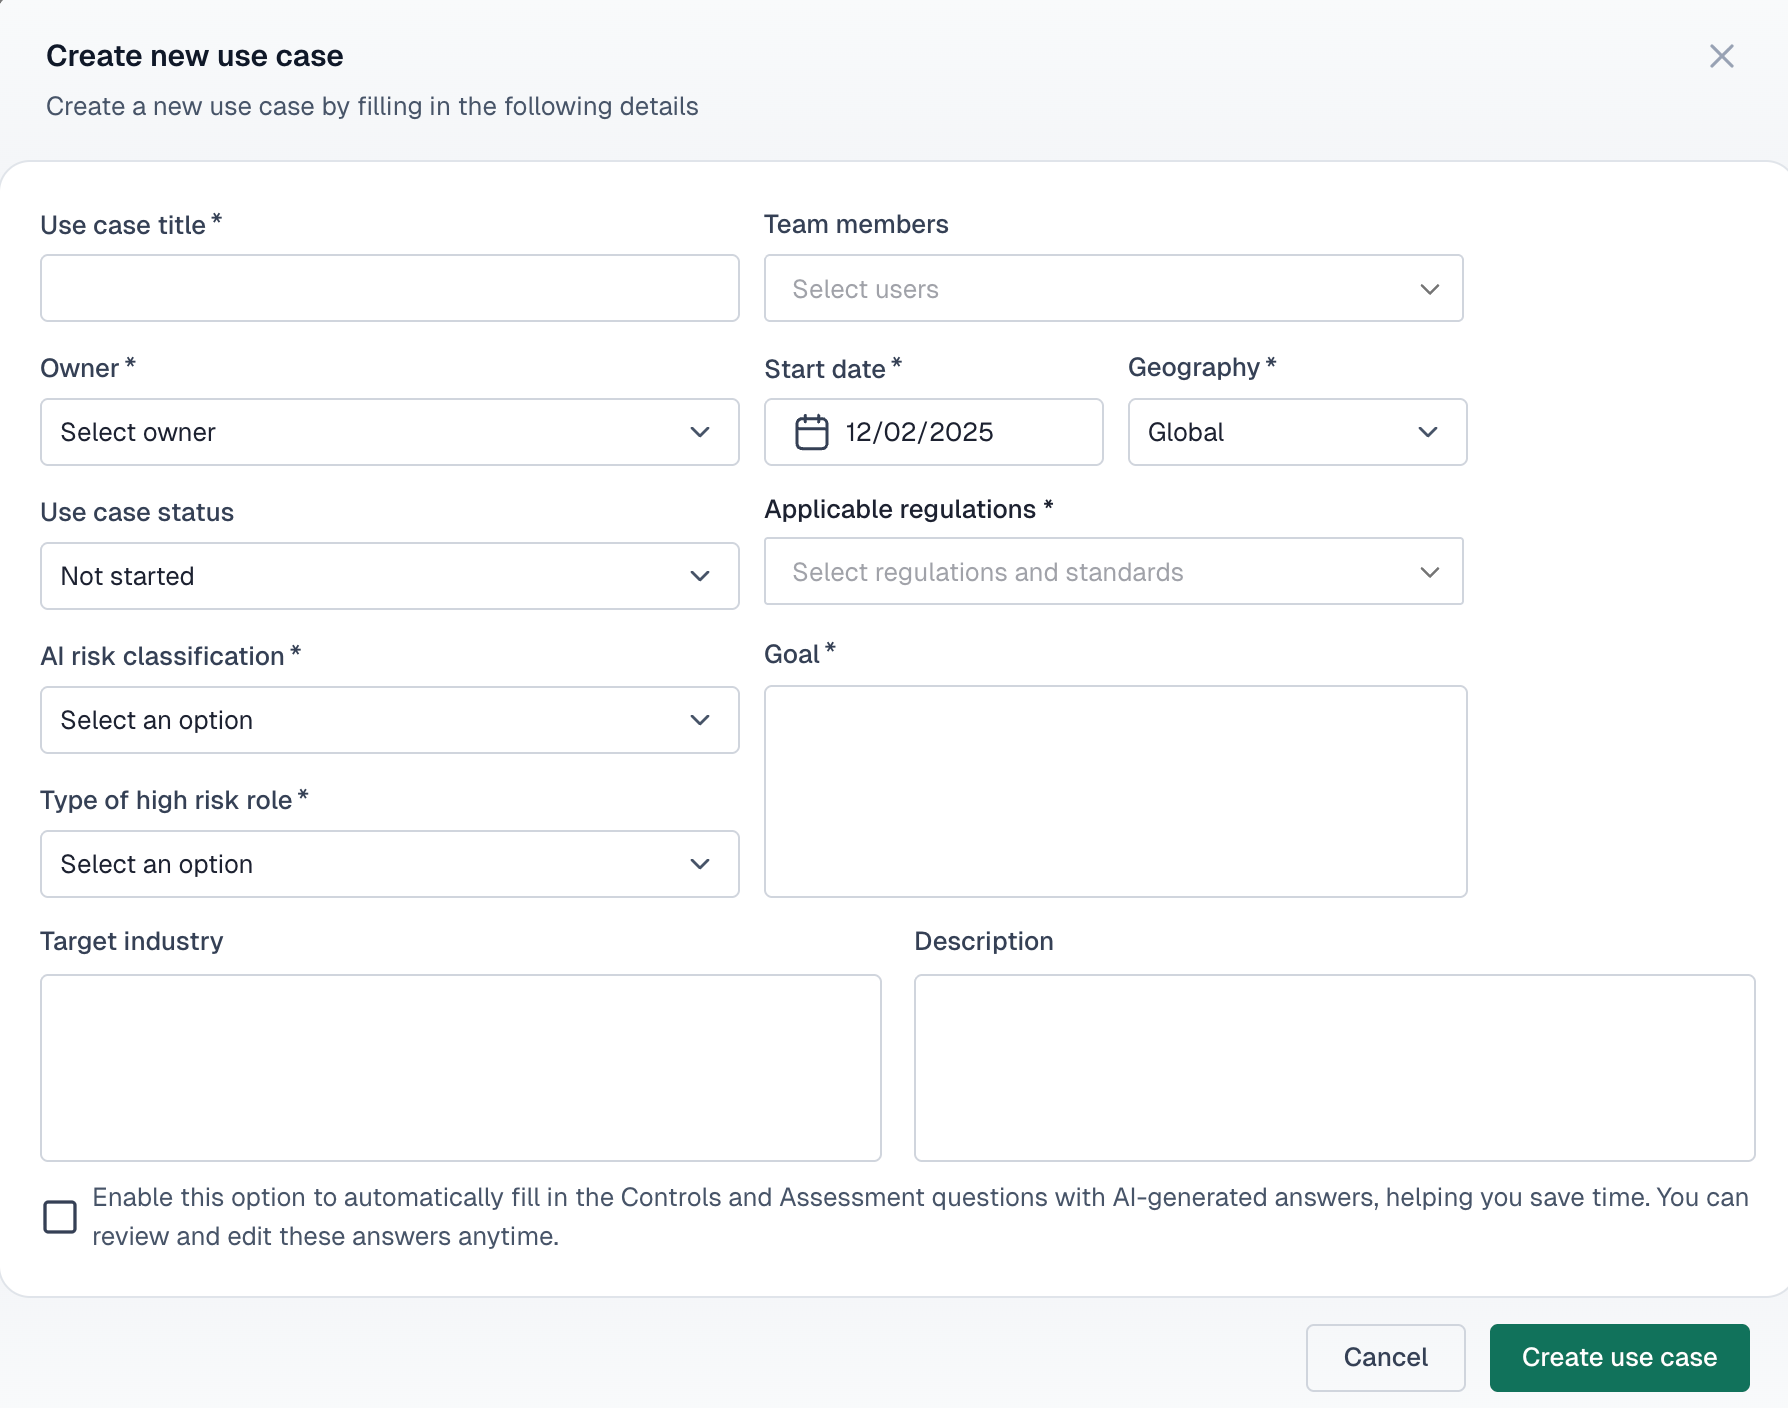
Step 1: Create a use case
A use case represents one AI system you want to govern. It gets its own risk register, framework tracking and evidence collection. You can have as many as you need.
- From the dashboard, open the "Add new" dropdown and select "Use case"
- Fill in the name (e.g., "Customer Support Chatbot"), owner, start date and geography
- Select the applicable regulations and AI risk classification
- Add a brief goal and description, then click "Create"
Step 2: Attach a compliance framework
Frameworks define what requirements you need to satisfy. When you attach one, VerifyWise generates the full set of controls and sub-controls for you to work through.
EU AI Act
European AI regulation for high-risk systems
ISO 42001
AI management system standard
ISO 27001
Information security management
NIST AI RMF
US AI risk management framework
- Click into your new use case from the dashboard or sidebar (Inventory → Use cases)
- Open the "Frameworks/regulations" tab
- Click "Add framework" and select the one that applies
- The controls and sub-controls populate automatically
Step 3: Review your controls
Controls are the individual requirements from your framework. Each one has sub-controls with specific implementation criteria. You don't need to complete them all now; just get familiar with the structure.
- Stay on the "Frameworks/regulations" tab in your use case
- Click into any framework to see its controls grouped by category
- Click a control to expand its sub-controls and detailed requirements
- Update status as you work (Not started → In progress → Implemented)
Step 4: Upload evidence
Evidence is anything that proves you've implemented a control: policy documents, test results, screenshots, signed approvals, data processing agreements.
- In the sidebar, go to Assurance → Evidence
- Click "Upload evidence"
- Select a file (PDF, DOCX, images, etc.) and give it a title
- Add a description of what this file demonstrates
- Link it to the relevant control(s) and click "Save"
Step 5: Check your progress
Go back to the dashboard. Your use case now shows a compliance percentage based on how many controls you've addressed. Click into the use case to see the full breakdown on the Overview tab.
The use case overview shows
- •Compliance percentage, which increases as you implement controls
- •Risk summary with counts by severity level
- •Framework progress per attached framework

What to do next
You've got the basics in place. Here are good next steps depending on where you want to focus:
- Link models: Go to the "Linked models" tab in your use case to associate specific AI models
- Add risks: Use the "Use case risks" tab to document what could go wrong and how you plan to handle it
- Invite your team: Go to Settings → User management to add colleagues with appropriate roles
- Track vendors: If you use third-party AI services, register them under Governance → Vendors
- Write policies: Document your internal AI policies under Governance → Policy manager