User management
Manage profile, password, team, and preferences.
Overview
User management lets administrators control who has access to the platform and what they can do. From the Settings page, you can manage your own profile, update security credentials and administer team members.
Settings tabs
The Settings page has several tabs for different configuration areas:
Profile
Update your personal information and profile photo.
Password
Change your account password.
Team
Manage team members, roles and invitations.
Organization
Configure organization name and branding.
Preferences
Set personal preferences like date format.
API keys
Manage API tokens for programmatic access.
Profile settings
The Profile tab is where you manage your personal account information.
Personal information
You can update the following:
- Name: Your first name (2-50 characters)
- Surname: Your last name (2-50 characters)
- Email: Your email address (read-only, can't be changed)
Click Save after making changes to update your profile.
Profile photo
You can upload a profile photo that appears next to your name throughout the platform:
- Update: Click Update to select a new photo from your computer
- Delete: Click Delete to remove your current photo
- Requirements: Recommended 200x200 pixels, max 5MB, PNG/JPG/GIF/SVG formats
Deleting your account
You can permanently delete your account from the Profile tab. This removes all your data from the system and can't be undone.
Changing your password
The Password tab lets you update your account password.
- Go to Settings and select the Password tab
- Enter your current password
- Enter your new password
- Confirm your new password
- Click Save to apply the change
Team management
The Team tab lets admins manage users in your organization.
Viewing team members
The team table lists all users with the following information:
- Name: The user's full name
- Email: The user's email address
- Role: The user's assigned role (Admin, Reviewer, Editor, Auditor; Super Admin where applicable)
- Action: Delete button to remove the user
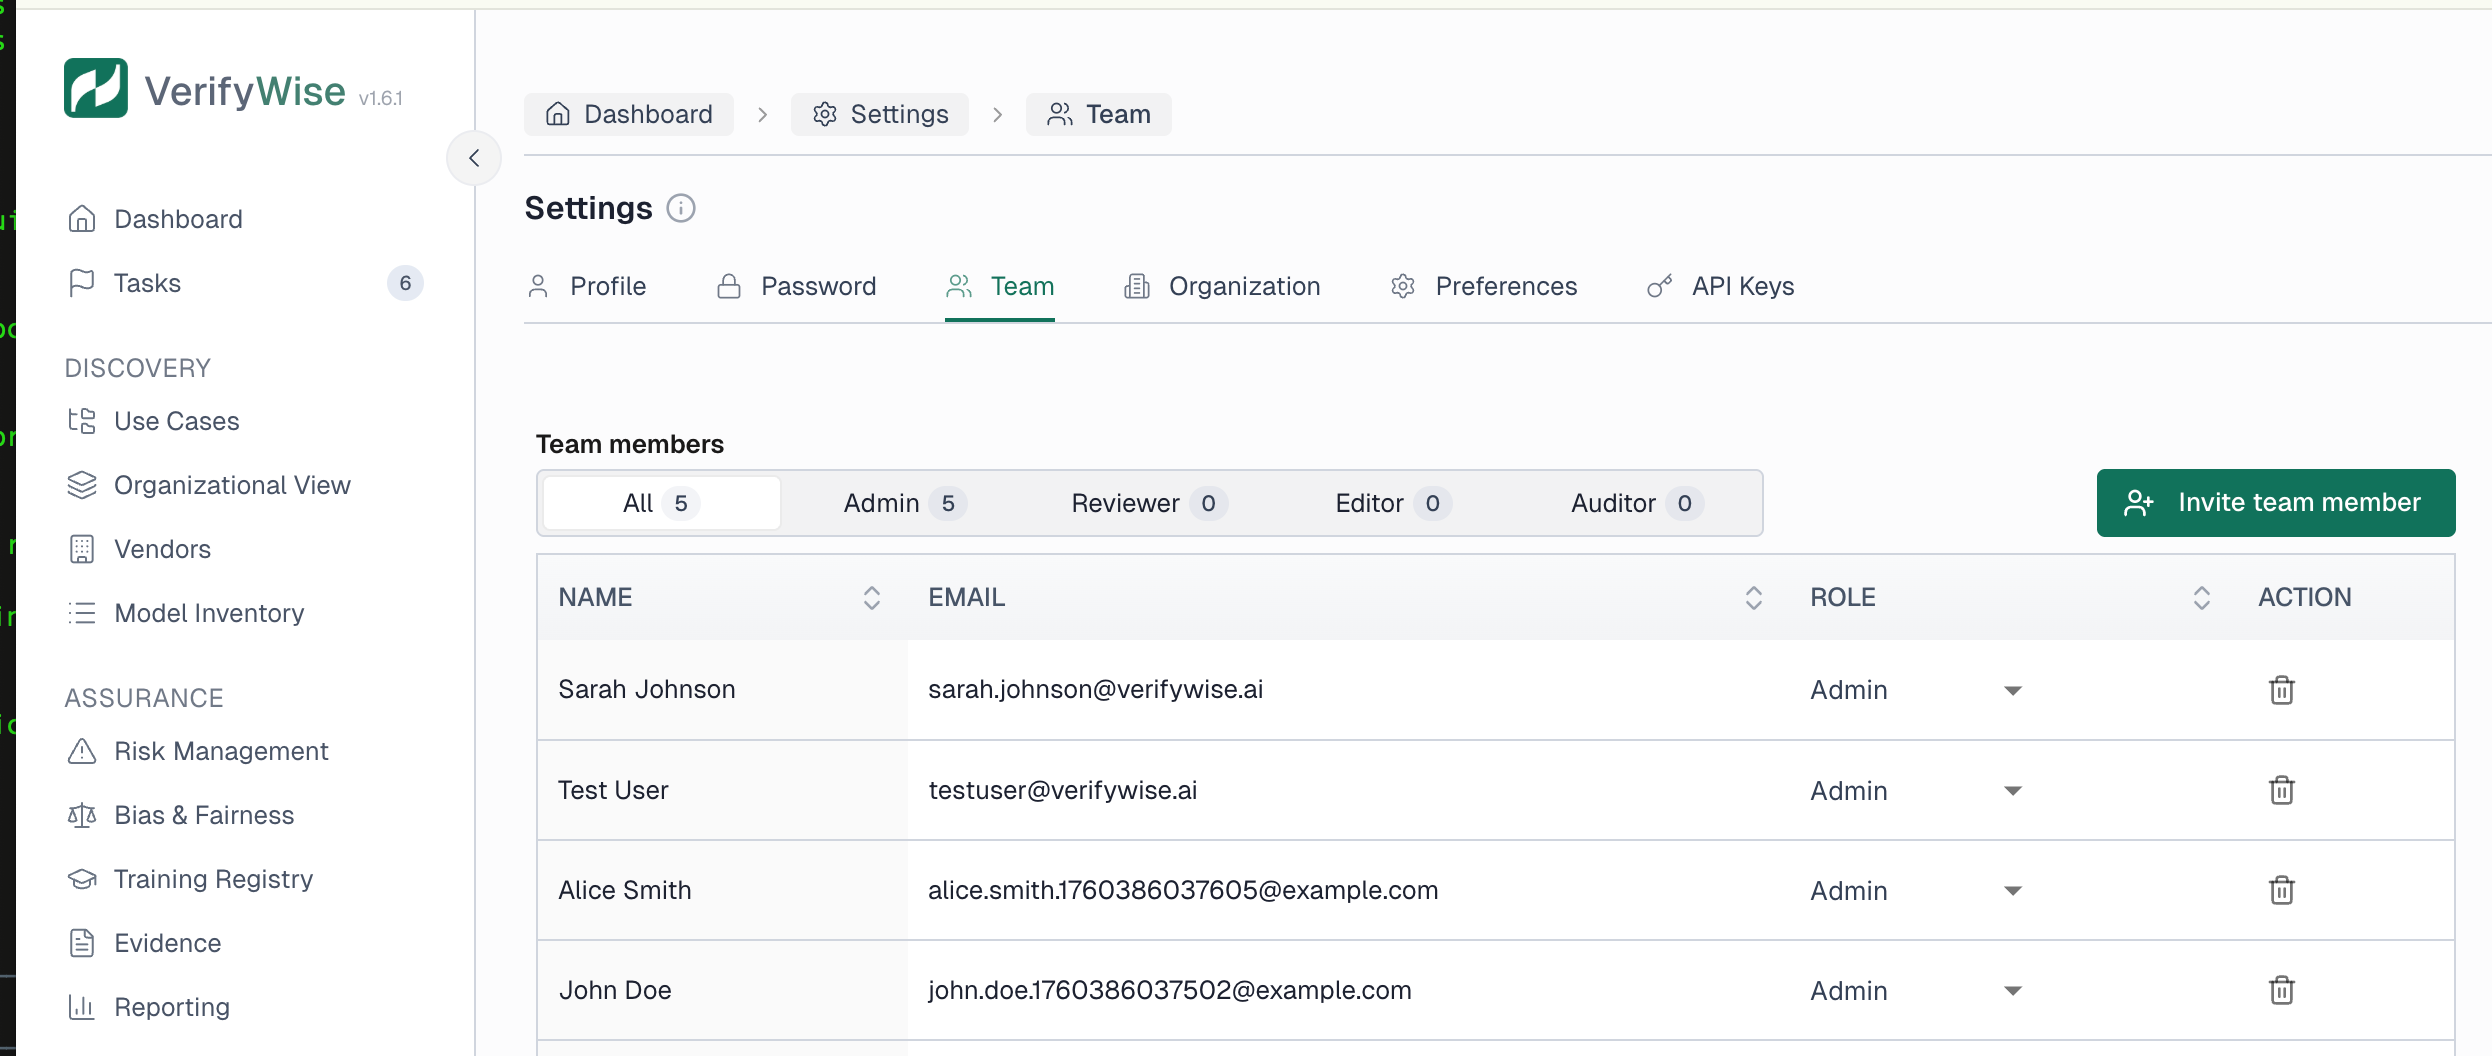
Use the filter buttons at the top to show all users or filter by role. Click column headers to sort the table.
Inviting new team members
To invite a new user to your organization:
- Click "Invite team member"
- Enter the user's email address
- Select the role to assign (Admin, Reviewer, Editor or Auditor)
- Click Send invitation
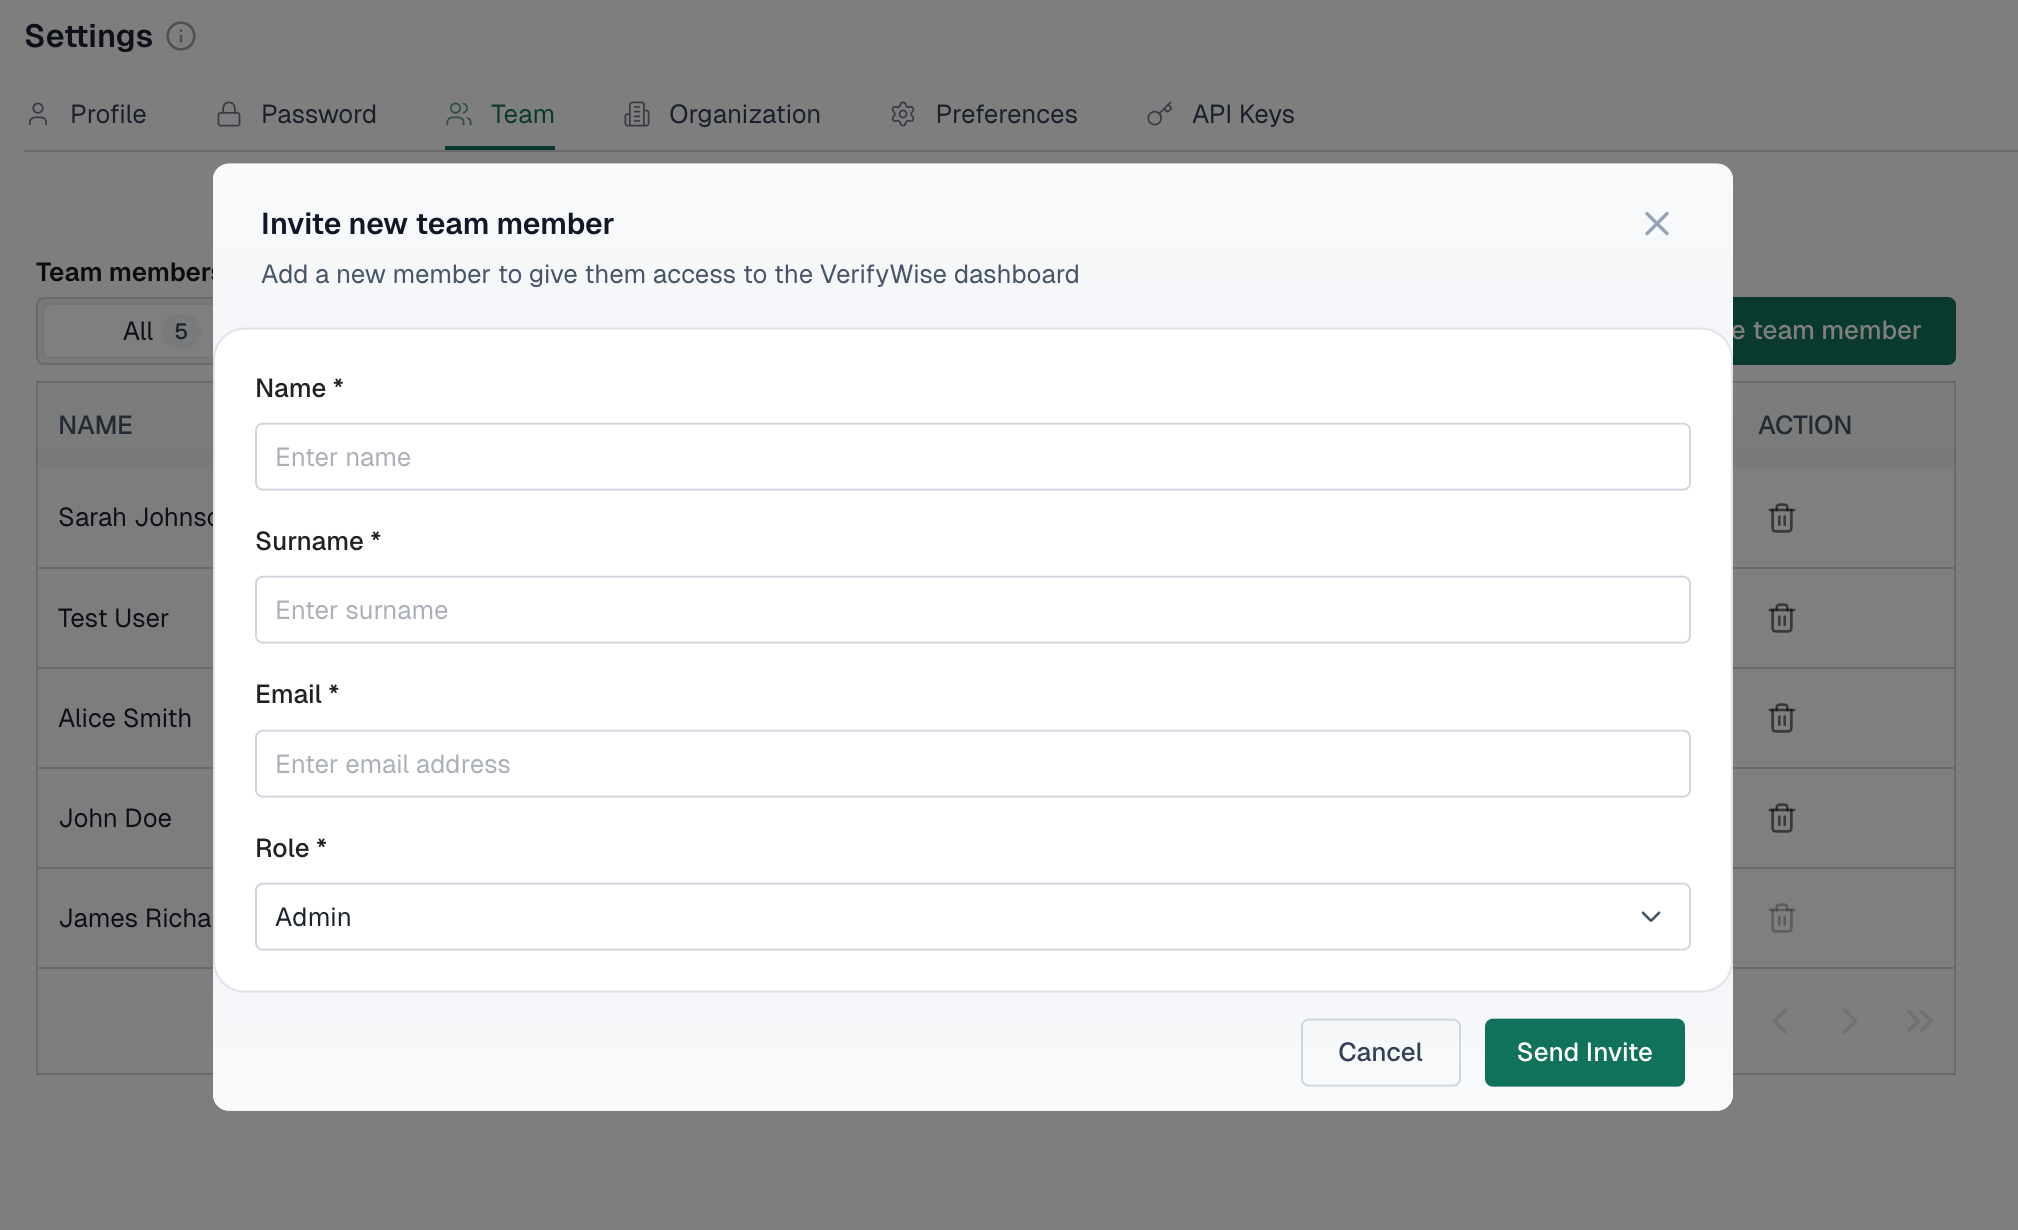
The user gets an email with a link to create their account and join your organization.
Changing user roles
To change a user's role:
- Find the user in the team table
- Click on the role dropdown in their row
- Select the new role
- The change saves automatically
Removing team members
To remove a user from your organization:
- Find the user in the team table
- Click the delete icon in the Action column
- Confirm the deletion when prompted
Removed users lose access to the platform right away. You can't delete your own account from the Team tab.
Preferences
The Preferences tab lets you customize how information is displayed for your account.
- Date format: Choose how dates appear throughout the platform (e.g., DD-MM-YYYY, MM-DD-YYYY, YYYY-MM-DD)
Click Save after changing your preferences. Settings are stored and applied whenever you log in.
Frequently asked questions
Why can't I change my email address?
Email addresses are used as unique identifiers and can't be changed after registration. If you need a different email, you'll have to create a new account.
A team member didn't receive their invitation email. What should I do?
Ask them to check their spam or junk folder. If it's not there, send a new invitation. Some organizations have email filtering that may block invitation emails.
Who can invite new team members?
Users with Admin or Editor roles can invite new team members. Reviewers and Auditors can't send invitations.